Chemical safety relies heavily on clear communication, and one of the most recognizable ways hazards are conveyed is through GHS pictograms. These red diamond-shaped symbols, required under OSHA’s Hazard Communication Standard (HazCom 2012), are part of the Globally Harmonized System of Classification and Labelling of Chemicals (GHS).
Understanding these pictograms is especially important when labeling secondary containers such as the smaller bottles, jugs, or dispenser chemicals that are transferred into the workplace. Even if chemicals are only stored temporarily, proper labeling with the correct pictograms ensures workers can quickly identify hazards and stay safe.
This guide explains the origins of the GHS system, why pictograms matter, and what each of the nine symbols means in practice.
Where Do GHS Pictograms Come From?
The GHS was created by the United Nations to standardize how chemical hazards are classified and communicated worldwide. Before GHS, countries used their own systems, leading to confusion and accidents when chemicals crossed borders.
Pictograms were introduced as a universal visual language for chemical safety. The use of a red diamond frame ensures they stand out on labels, and each symbol corresponds to a category of hazard (physical, health, or environmental).
In the United States, OSHA’s HazCom 2012 adopted these pictograms, meaning every employer must use them on both primary labels (from the manufacturer) and secondary workplace labels
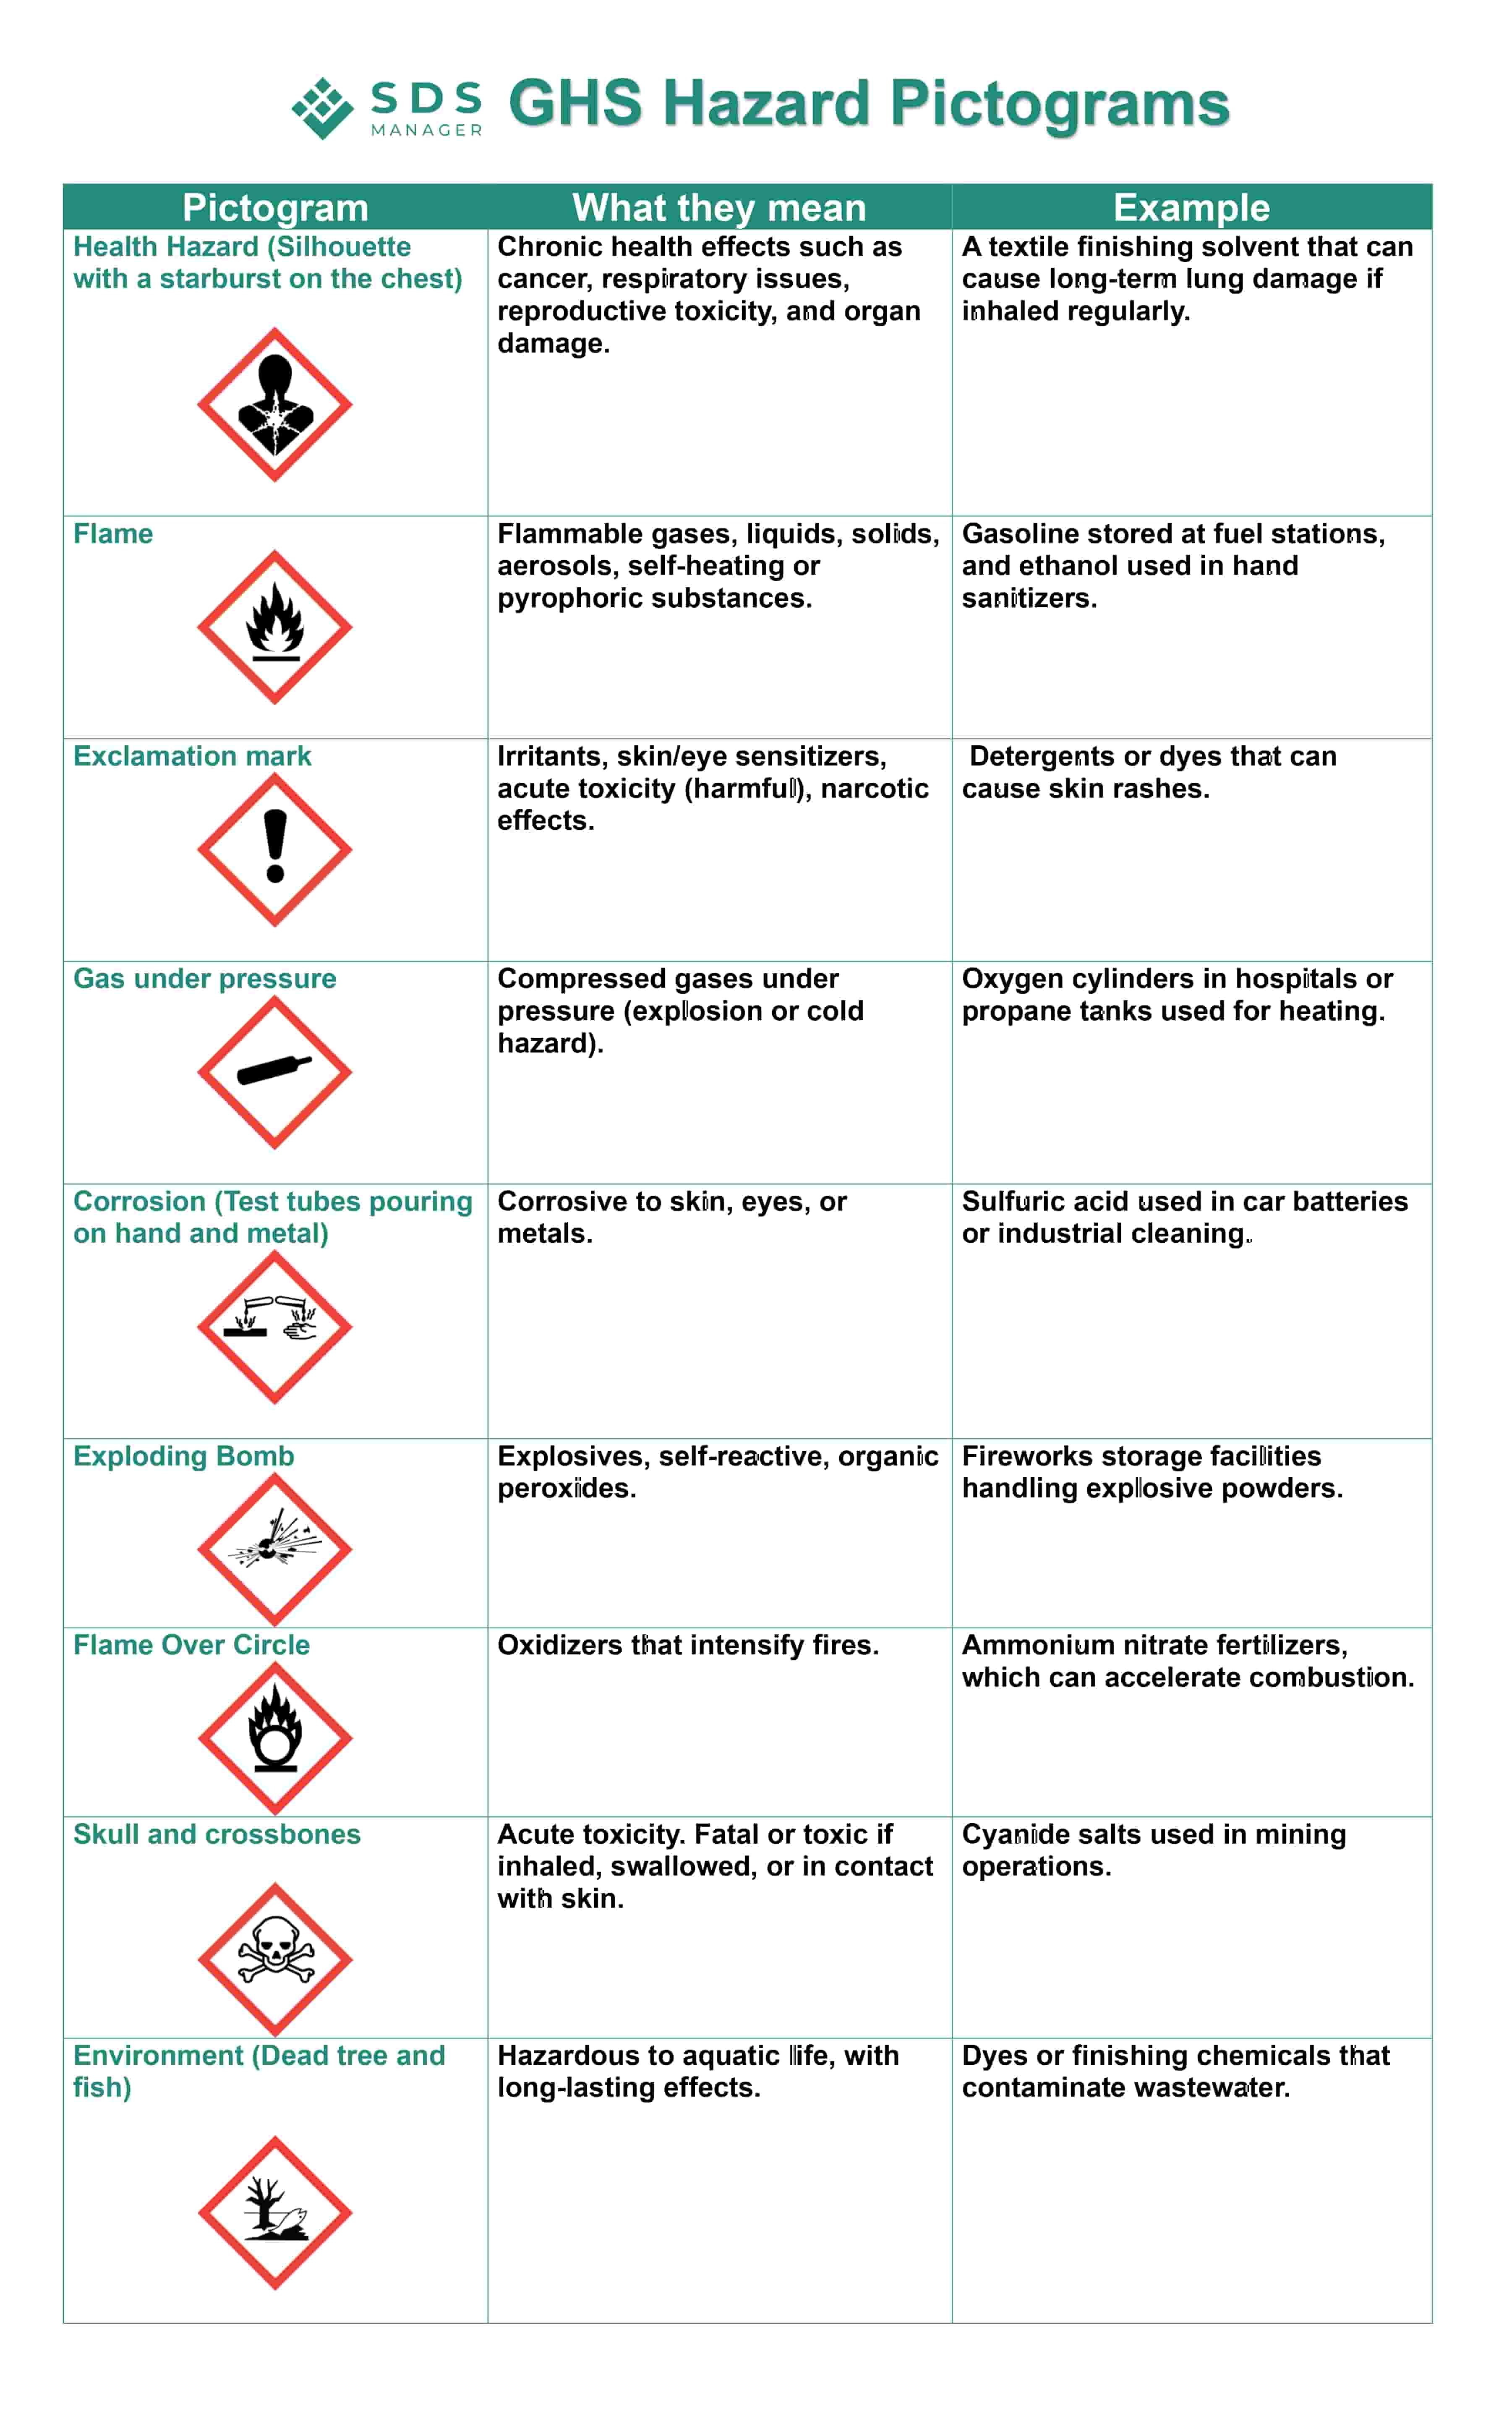
The 9 GHS Pictograms Explained
- Health Hazard: Indicates chronic health effects such as cancer, respiratory issues, reproductive toxicity, and organ damage.
- Flame: Represents substances that are flammable, including gases, liquids, solids, aerosols, as well as self-heating or pyrophoric materials.
- Exclamation Mark: Used for irritants, skin or eye sensitizers, harmful acute toxicity, or narcotic effects.
- Gas Cylinder: Identifies compressed gases under pressure that may present explosion or cold hazards.
- Corrosion (Test tubes pouring on hand and metal): Warns of materials that are corrosive to skin, eyes, or metals.
- Exploding Bomb: Marks chemicals that are explosive, self-reactive, or organic peroxides.
- Flame Over Circle: Indicates oxidizers that can intensify fires.
- Environment (Dead tree and fish): Used for substances hazardous to aquatic life with long-lasting effects. (Note: Not enforced by OSHA, but commonly used.)
- Skull and Crossbones: Signals acute toxicity, meaning substances that are fatal or toxic if inhaled, swallowed, or absorbed through skin.
GHS Hazard Symbols and Their Meanings at a glance
Why Are Pictograms Important on Secondary Containers?
Secondary containers are common in labs, factories, warehouses, and workshops. Without clear labels, these containers can easily cause confusion or misuse. GHS pictograms on secondary labels provide:
- Instant hazard recognition – Workers can see risks at a glance.
- Consistency – The same symbols are used globally, reducing misinterpretation.
- Legal compliance – Avoids regulatory citations and penalties.
- Safety during emergencies – Firefighters, first aid responders, and inspectors know the hazards immediately.
Best Practices for Secondary Container Labeling
- Always match product identifiers to the SDS.
- Include relevant pictograms for quick hazard recognition.
- Use durable, smudge-resistant labels that withstand workplace conditions.
- Consider automated tools like the SDS Manager Secondary Label Generator to avoid errors and save time.
Making Compliance Easy
Proper labeling of secondary containers can be time-consuming if done manually. To simplify compliance, tools like the online label generators automatically pull hazard information, pictograms, and statements directly from your SDS. This ensures accuracy and saves time while keeping your workplace compliant.
Final Thoughts
GHS pictograms are more than just symbols, they are lifesaving warnings. Whether on primary or secondary containers, they help workers instantly recognize chemical risks and act safely. By understanding what each pictogram means and applying them consistently, workplaces can prevent accidents, reduce liability, and ensure compliance with OSHA’s HazCom standard.