Overview
This guide creates a SAML 2.0 app integration in Okta and connects it to SDS Manager - Inventory.
Prerequisites
- You have Okta Admin access.
- You have SDS Manager admin access to configure SSO in SDS Manager.
A) Configure Okta (Identity Provider)
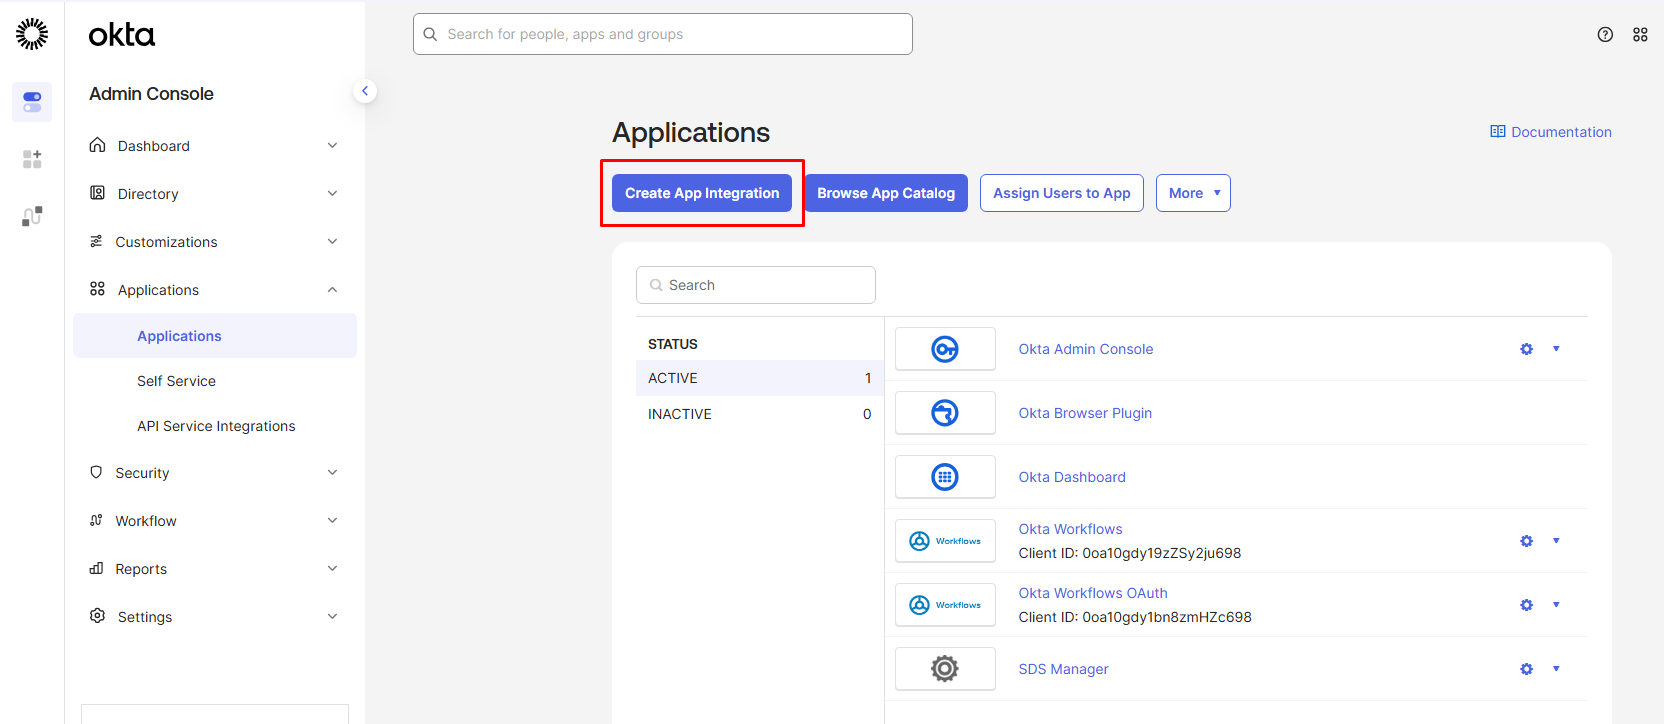
1) Create a new SAML app integration
- In Okta Admin Console go to Applications → Applications → Create App Integration.
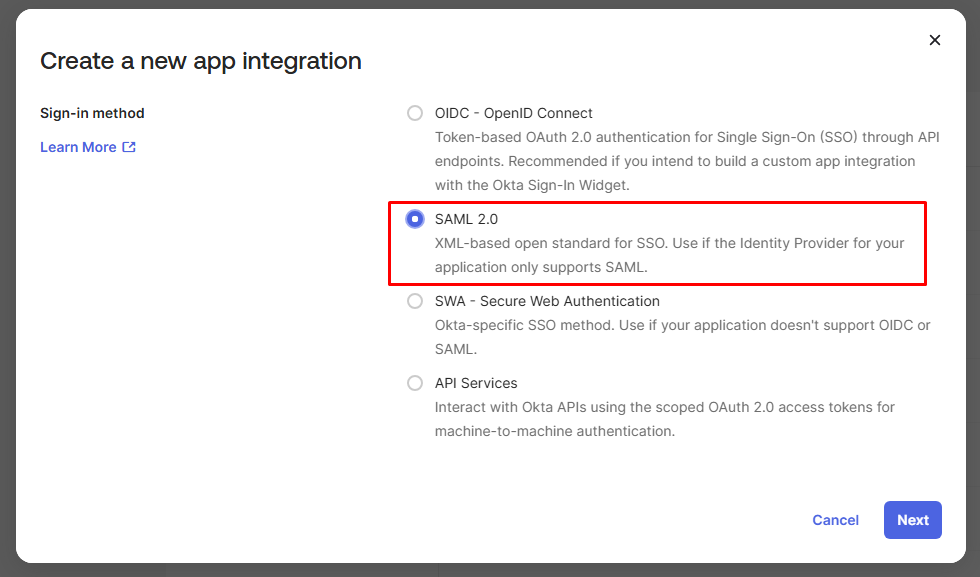
- Choose SAML 2.0.
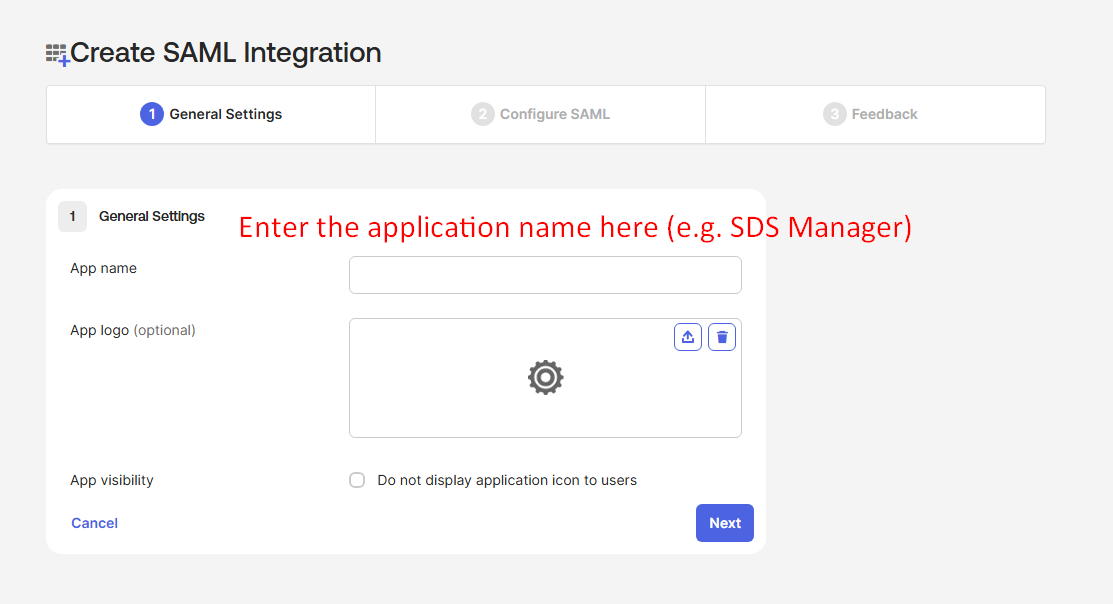
2) General Settings
- Enter an App name (optionally upload a logo).
- Click Next.
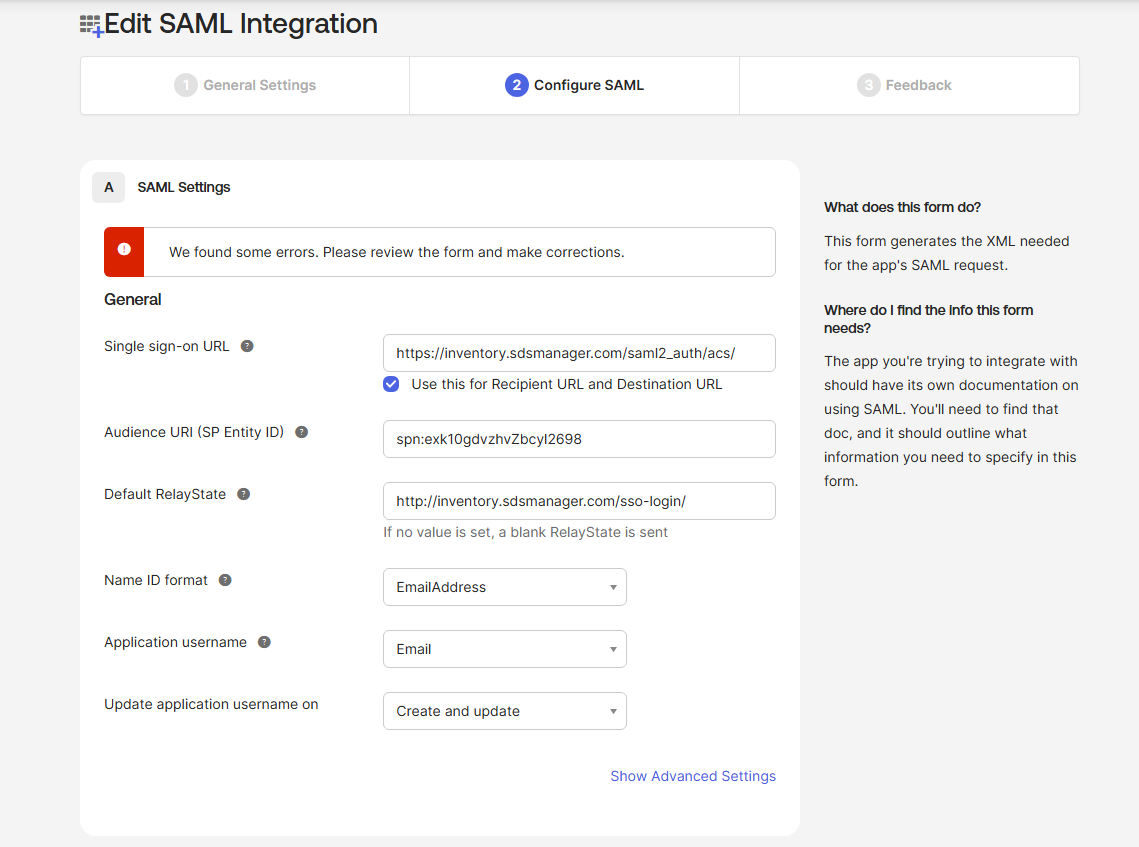
3) Configure SAML (initial pass)
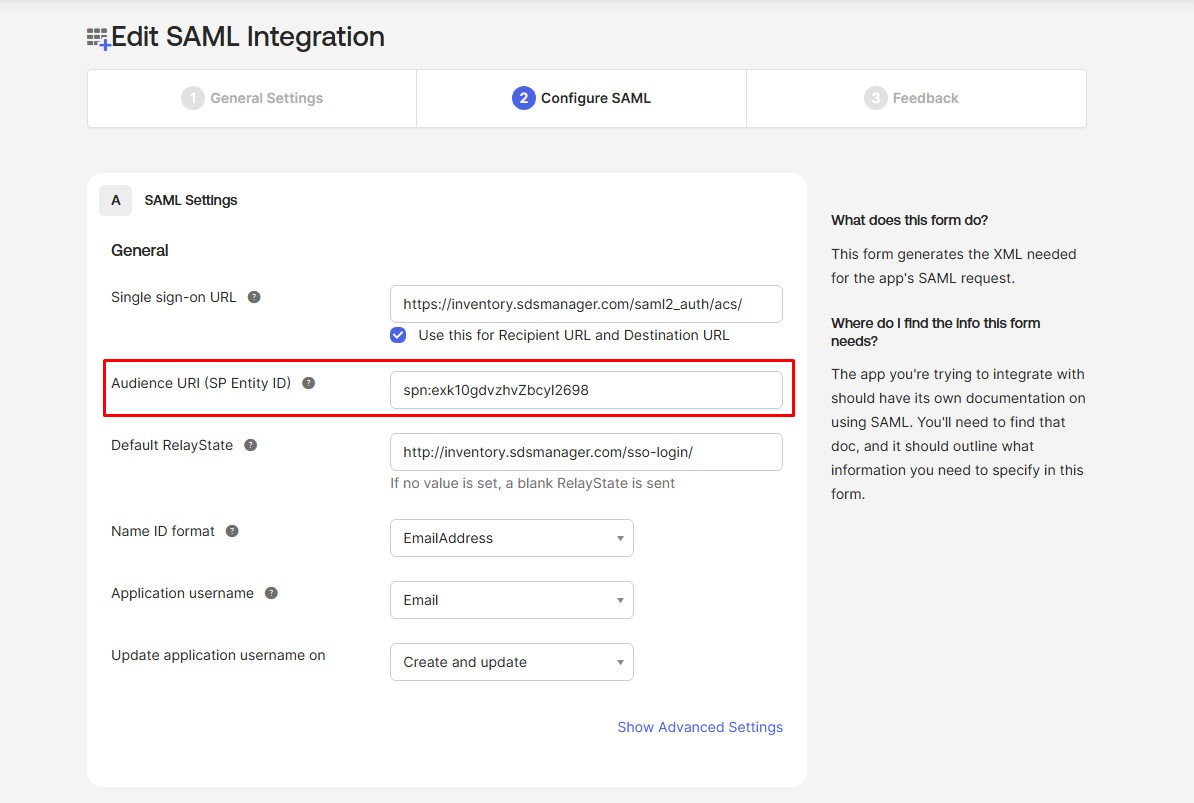
- Single sign-on URL: https://inventory.sdsmanager.com/saml2_auth/acs/
- Audience URI (SP Entity ID): temporary value (you will update this after Okta generates the App ID)
- Default RelayState: http://inventory.sdsmanager.com/sso-login/
- Name ID format: EmailAddress
- Application username:
Email (usually)
Click Next.
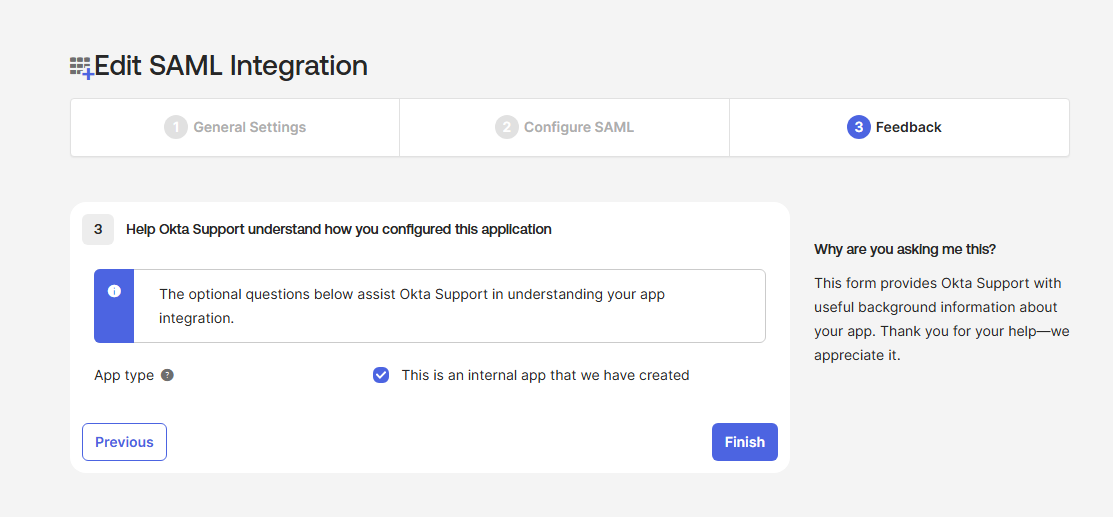
4) Feedback
- Select This is an internal app that we have created.
- Click Finish.
B) Get the Okta App ID and update the Audience URI
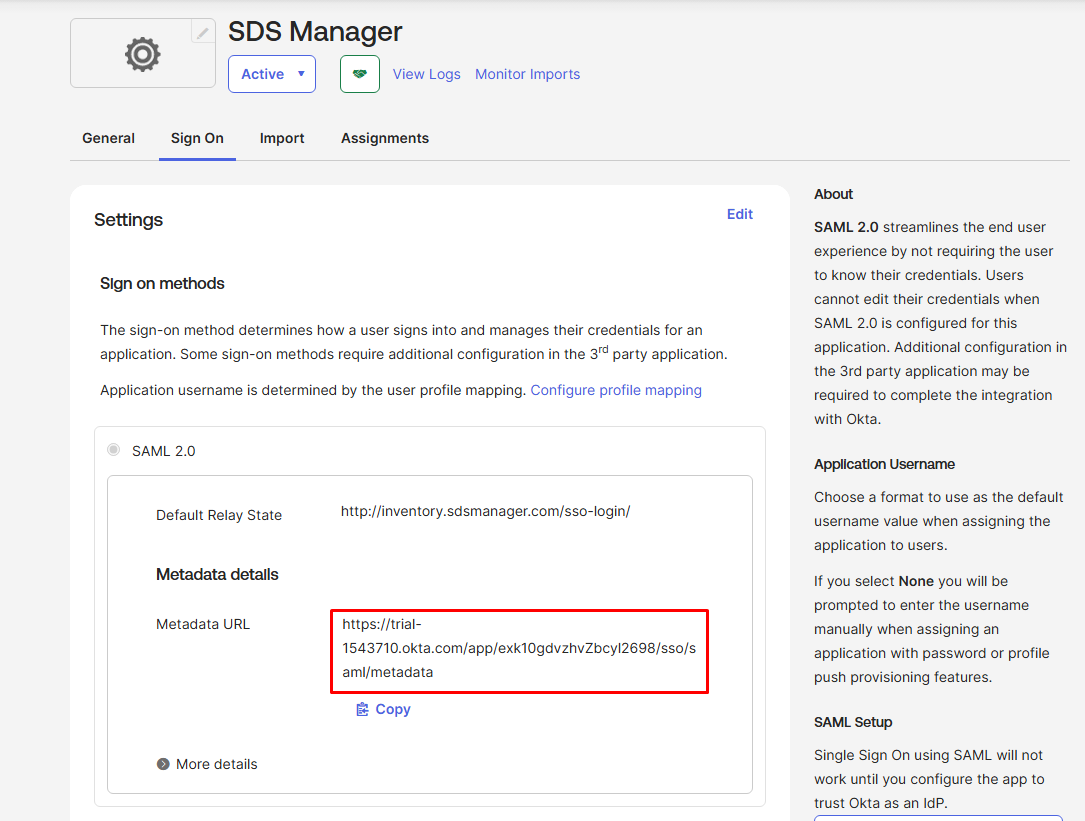
5) Copy the Okta App ID from Metadata URL
- Open the new app in Okta.
- Go to Sign On and find Metadata URL (or “View SAML setup instructions”).
- Copy the ID between /app/ and /sso/.
Example Metadata URL:
- https:///app/exk10gdvzhvZbcyl2698/sso/saml/metadata
- App ID = exk10gdvzhvZbcyl2698
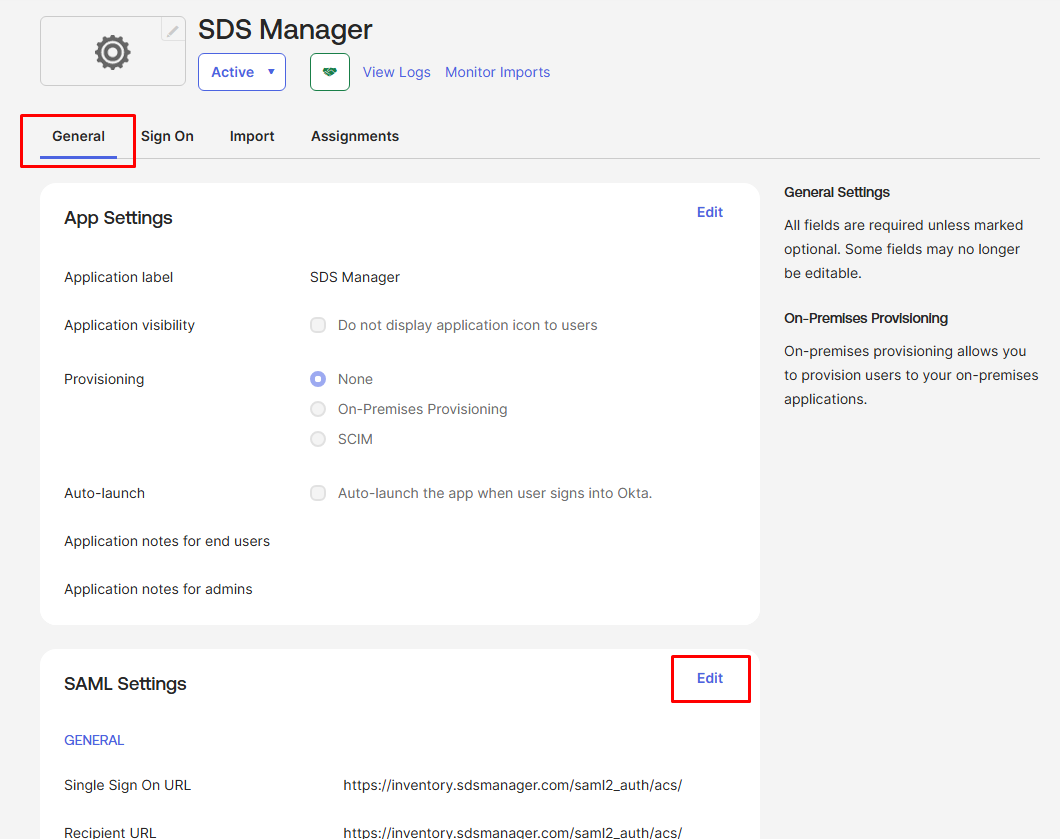
6) Update Audience URI (SP Entity ID)
- Go to General → SAML Settings → Edit (or Sign On → Edit SAML settings).
- Continue to Configure SAML.
- Set:
- Audience URI (SP Entity ID): spn:
Example:
- spn:exk10gdvzhvZbcyl2698
Save.
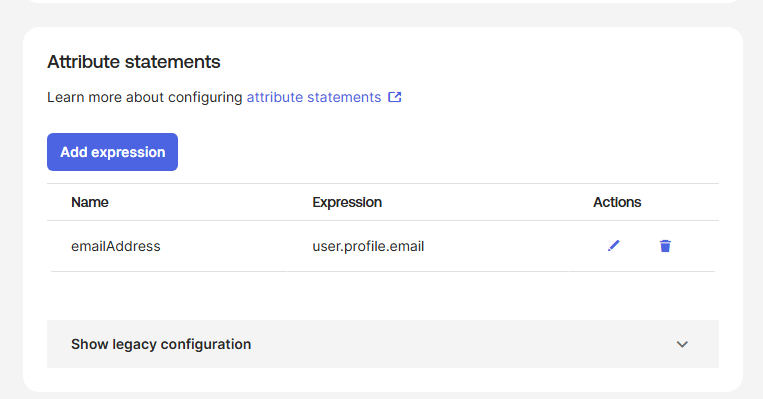
C) Add attribute statements (required)
In the app’s SAML settings, add these Attribute Statements:
- emailAddress = user.profile.email
Save.

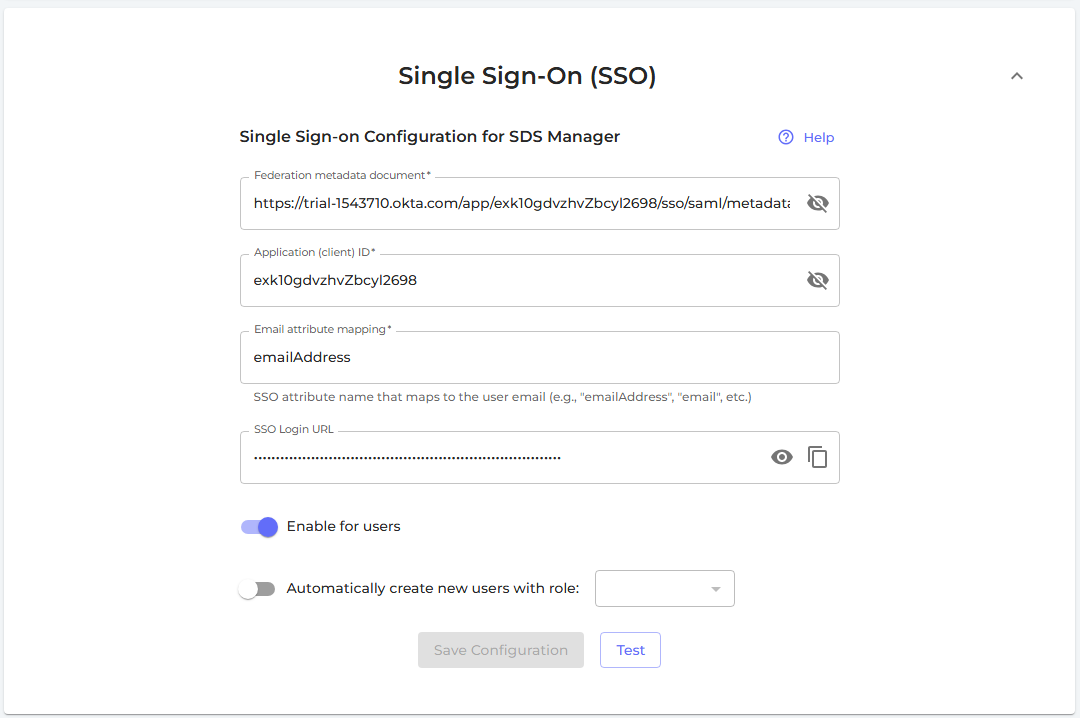
D) Configure SDS Manager
In SDS Manager → Settings → Single Sign-On (SSO), enter the IdP details from Okta (Issuer/SSO URL/Certificate) and save.
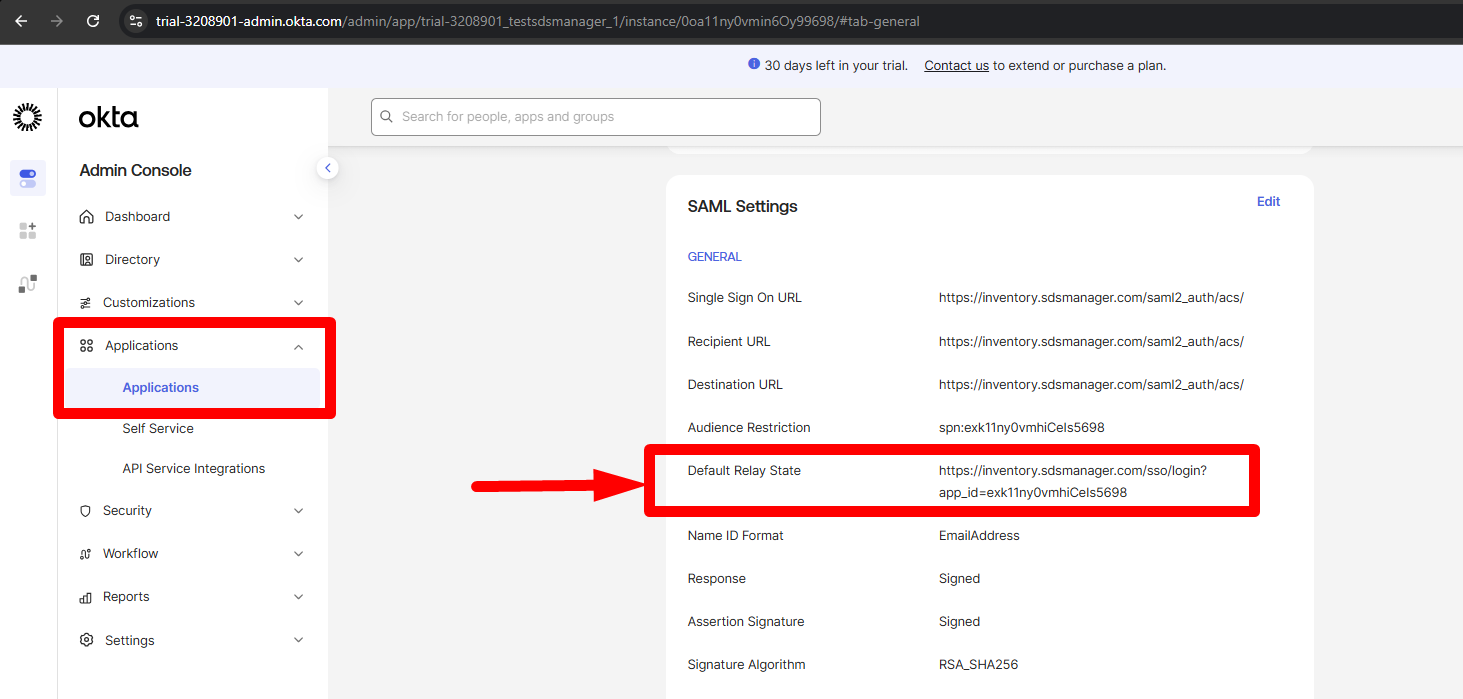
E) Add the SDS Manager embed link to the Okta app
Go to Okta → Applications → Applications → General → SAML Settings, then enter the SSO Login URL you received from the SDS Manager app into the Default Relay State field.
F) Assign users to groups in Okta
- Go to Directory → Groups → create groups matching your SDS Manager roles (e.g.
Admin,Staff) - Add users to the appropriate group
G) Add a Group attribute statement to the SAML app
1. Assign users to groups in Okta
- Go to Directory → Groups → create groups matching your SDS Manager roles (e.g.
Admin,Staff) - Add users to the appropriate group
2. Add a Group attribute statement to the SAML app
-
- Go to Applications → [your SDS Manager app] → Sign On → Edit SAML settings
- Scroll to Attribute Statements (Group)
-
Add a new group attribute:
- Name:
roles(or any name — this is what you enter in SDS Manager) - Filter: e.g.
Matches regex→.*(send all groups), orStarts with→ a prefix to filter only relevant groups
- Name:
- Save