Overview
This guide creates a SAML 2.0 app integration in Okta and connects it to SDS Manager, so your employees sign in to SDS Manager with their Okta account.
Prerequisites
- You have admin access to Okta.
- You are the owner of the SDS Manager account, and your account has the SSO subscription. Contact us to get SSO switched on.
A) Configure Okta (identity provider)
1) Create a new SAML app integration
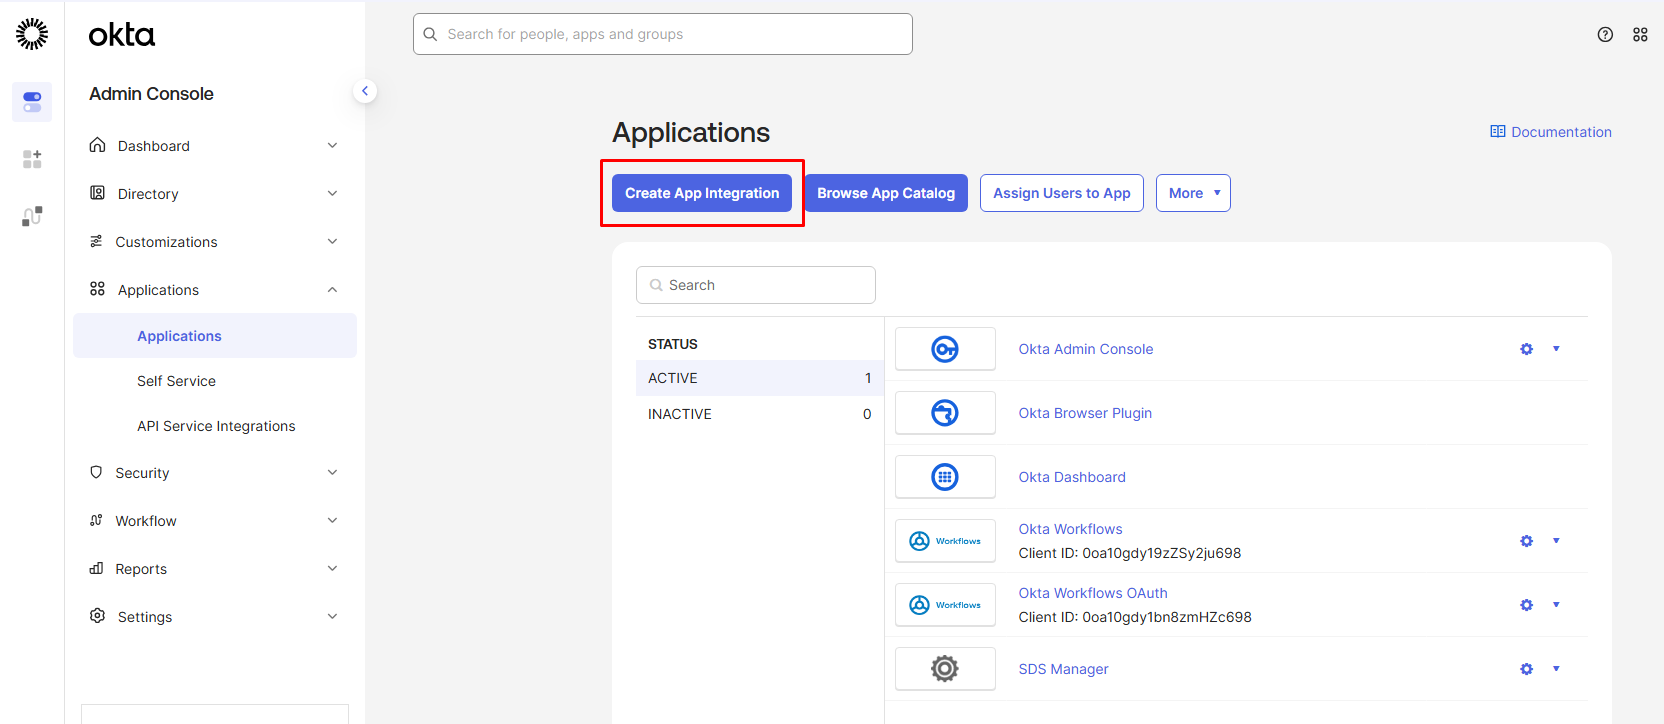
- In the Okta Admin Console, go to Applications → Applications → Create App Integration.
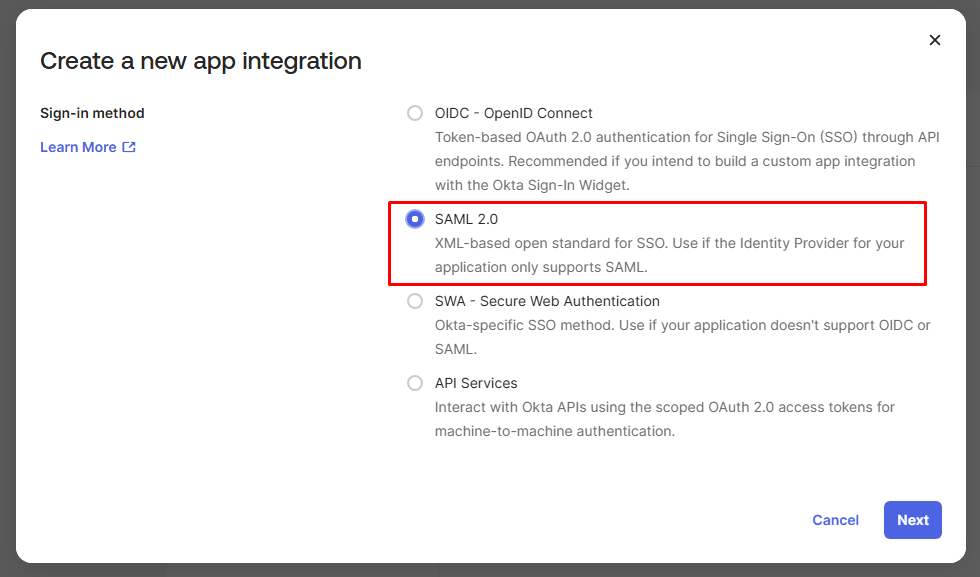
- Choose SAML 2.0.
2) General settings
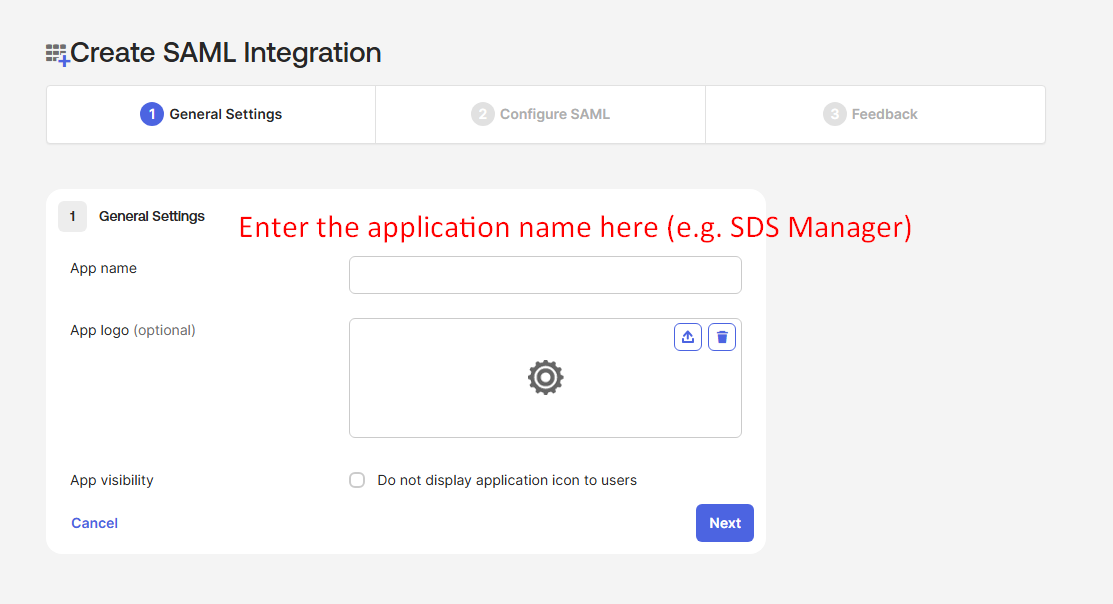
- Enter an App name (and upload a logo if you like).
- Click Next.
3) Configure SAML (first pass)
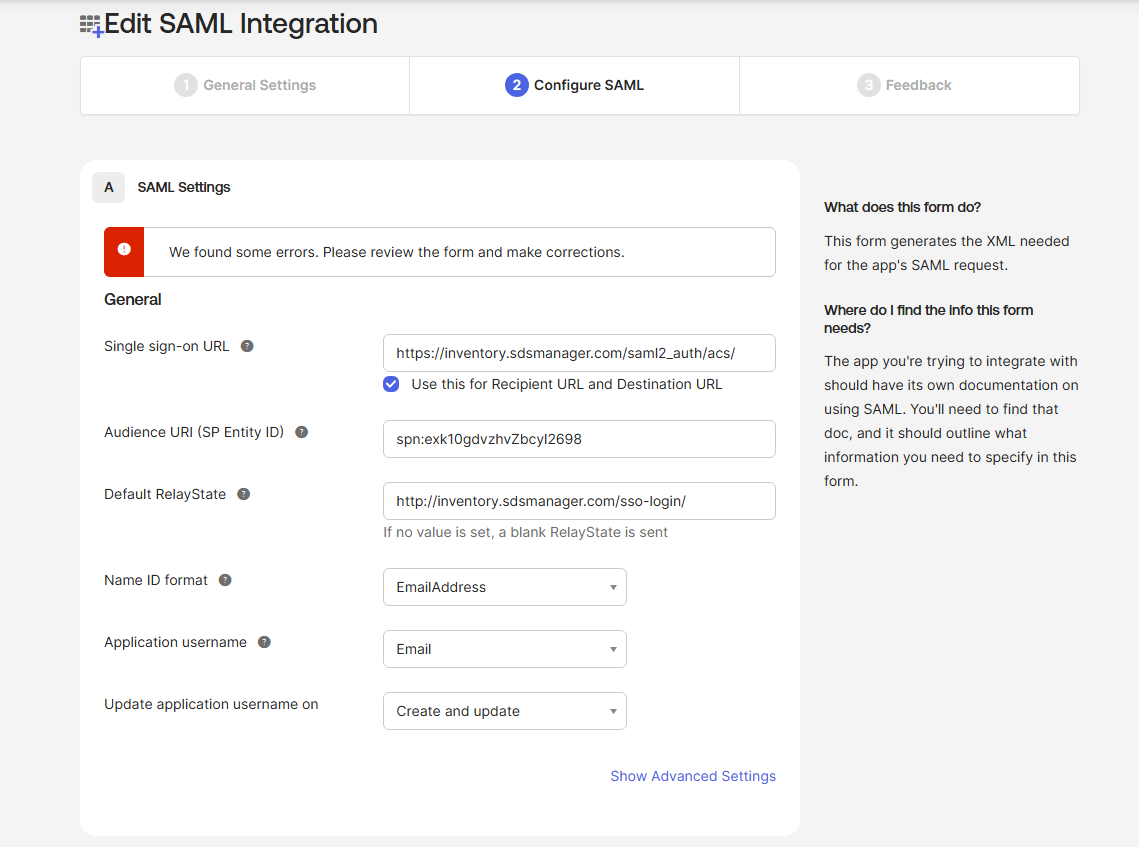
- Single sign-on URL:
https://inventory.sdsmanager.com/saml2_auth/acs/ - Audience URI (SP Entity ID): a temporary value. You change it in step 6, when Okta has made the App ID.
- Default RelayState: leave it blank for now. You fill it in in section E.
- Name ID format: EmailAddress
- Application username: Email
Click Next.
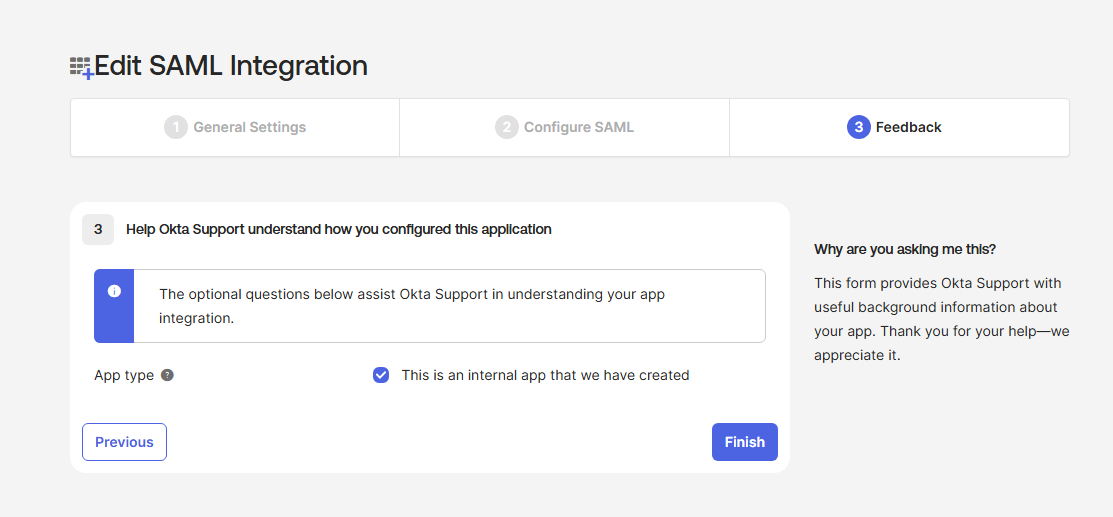
4) Feedback
- Select This is an internal app that we have created.
- Click Finish.
B) Get the Okta App ID and update the Audience URI
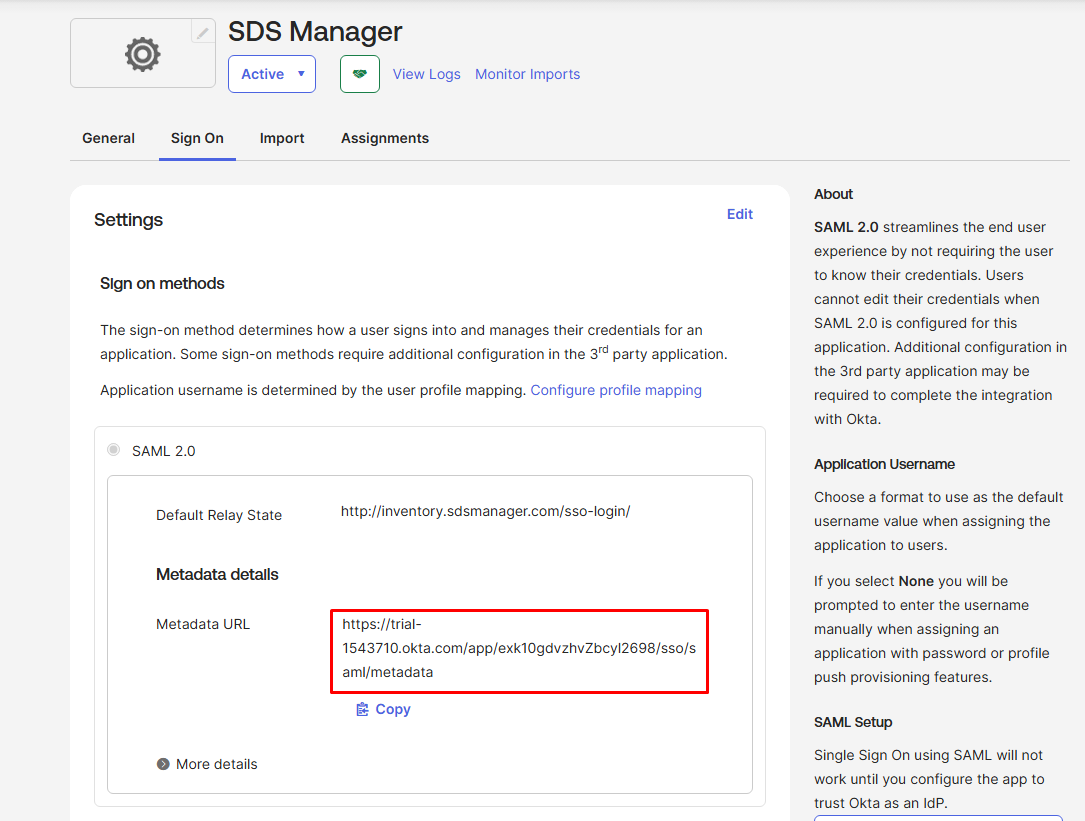
5) Copy the App ID from the Metadata URL
- Open the new app in Okta.
- Go to Sign On and find the Metadata URL. Copy the full URL: you need it in section D.
- The App ID is the part between
/app/and/sso/.
The Metadata URL looks like this:
https://<your-okta-domain>/app/<App ID>/sso/saml/metadataFor example, in https://example.okta.com/app/exk1a2b3c4D5e6F7g8h9/sso/saml/metadata the App ID is exk1a2b3c4D5e6F7g8h9.
6) Update the Audience URI (SP Entity ID)
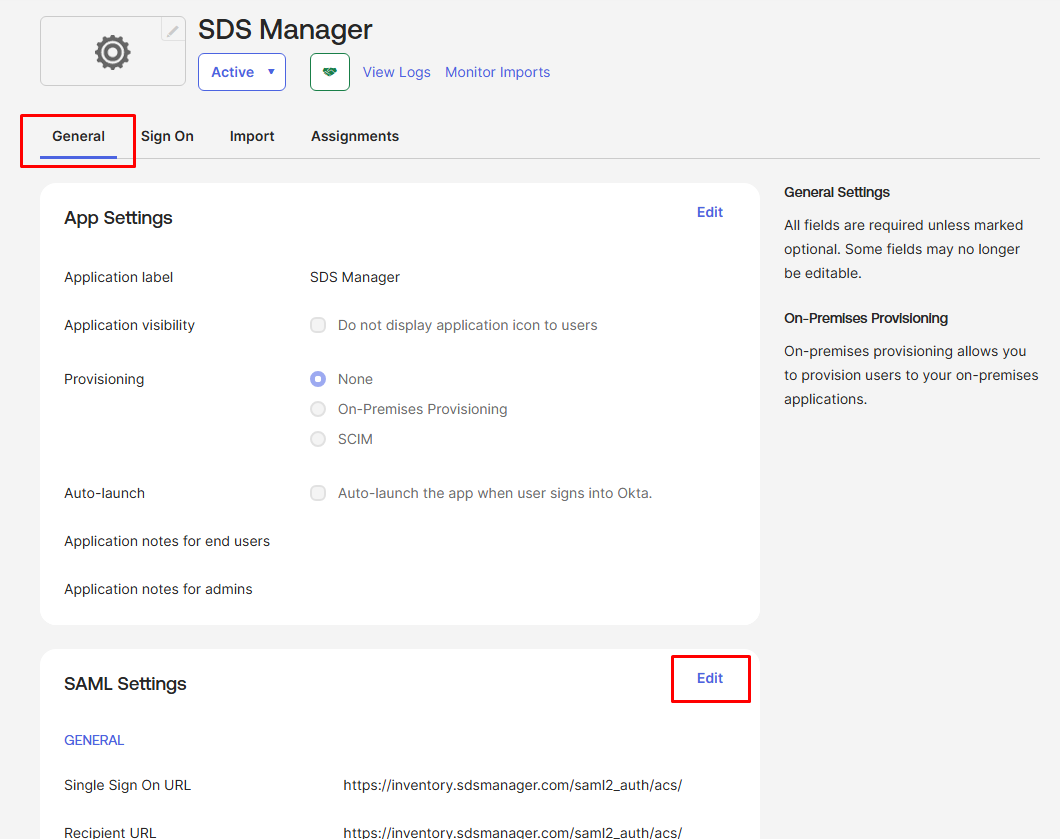
- Go to General → SAML Settings → Edit (or Sign On → Edit SAML settings).
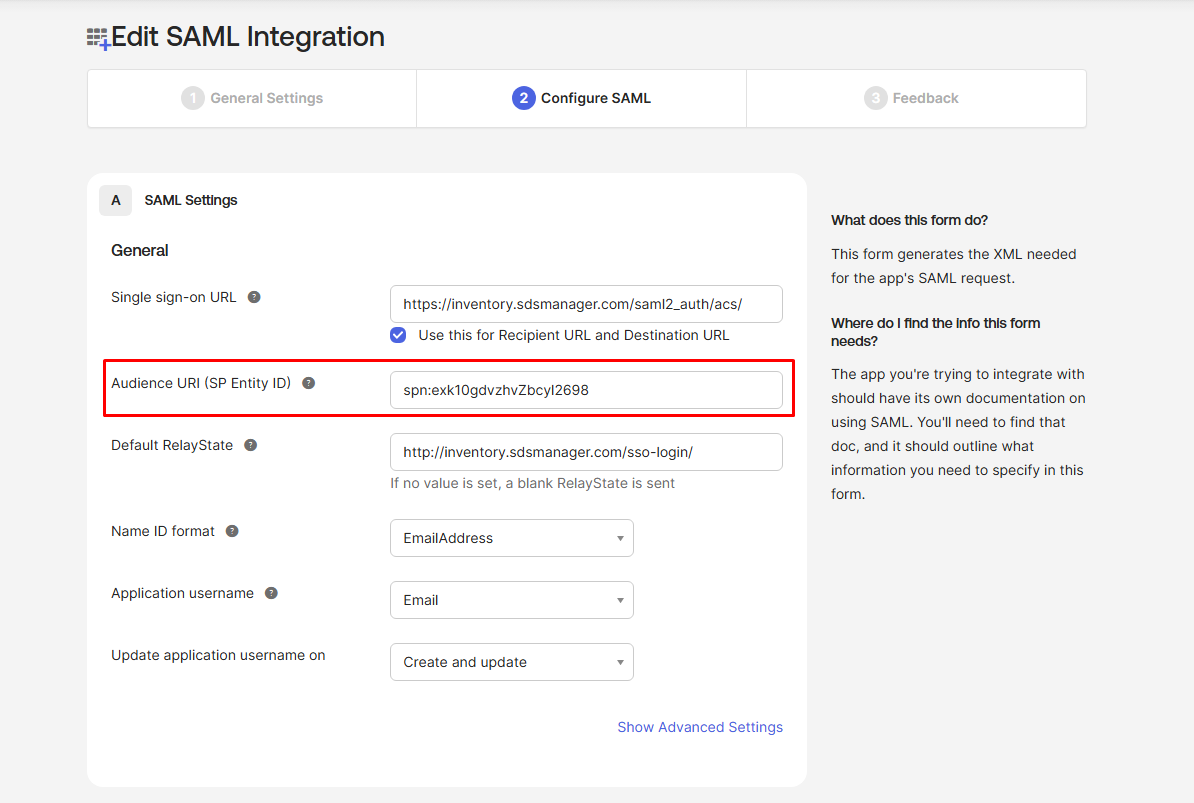
- Continue to Configure SAML.
- Set Audience URI (SP Entity ID) to
spn:<App ID>, for examplespn:exk1a2b3c4D5e6F7g8h9. - Save.
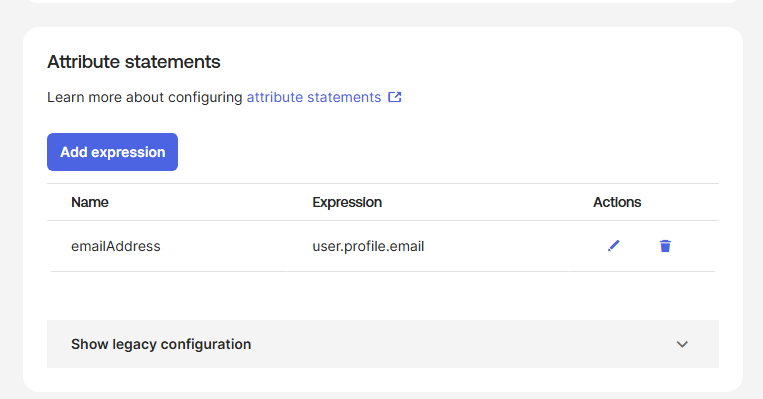
C) Add the e-mail attribute statement (required)
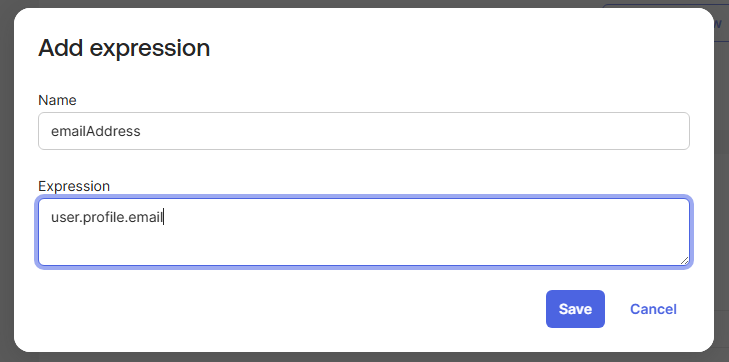
In the app's SAML settings, add this Attribute Statement:
- emailAddress =
user.profile.email
Save.
D) Configure SDS Manager
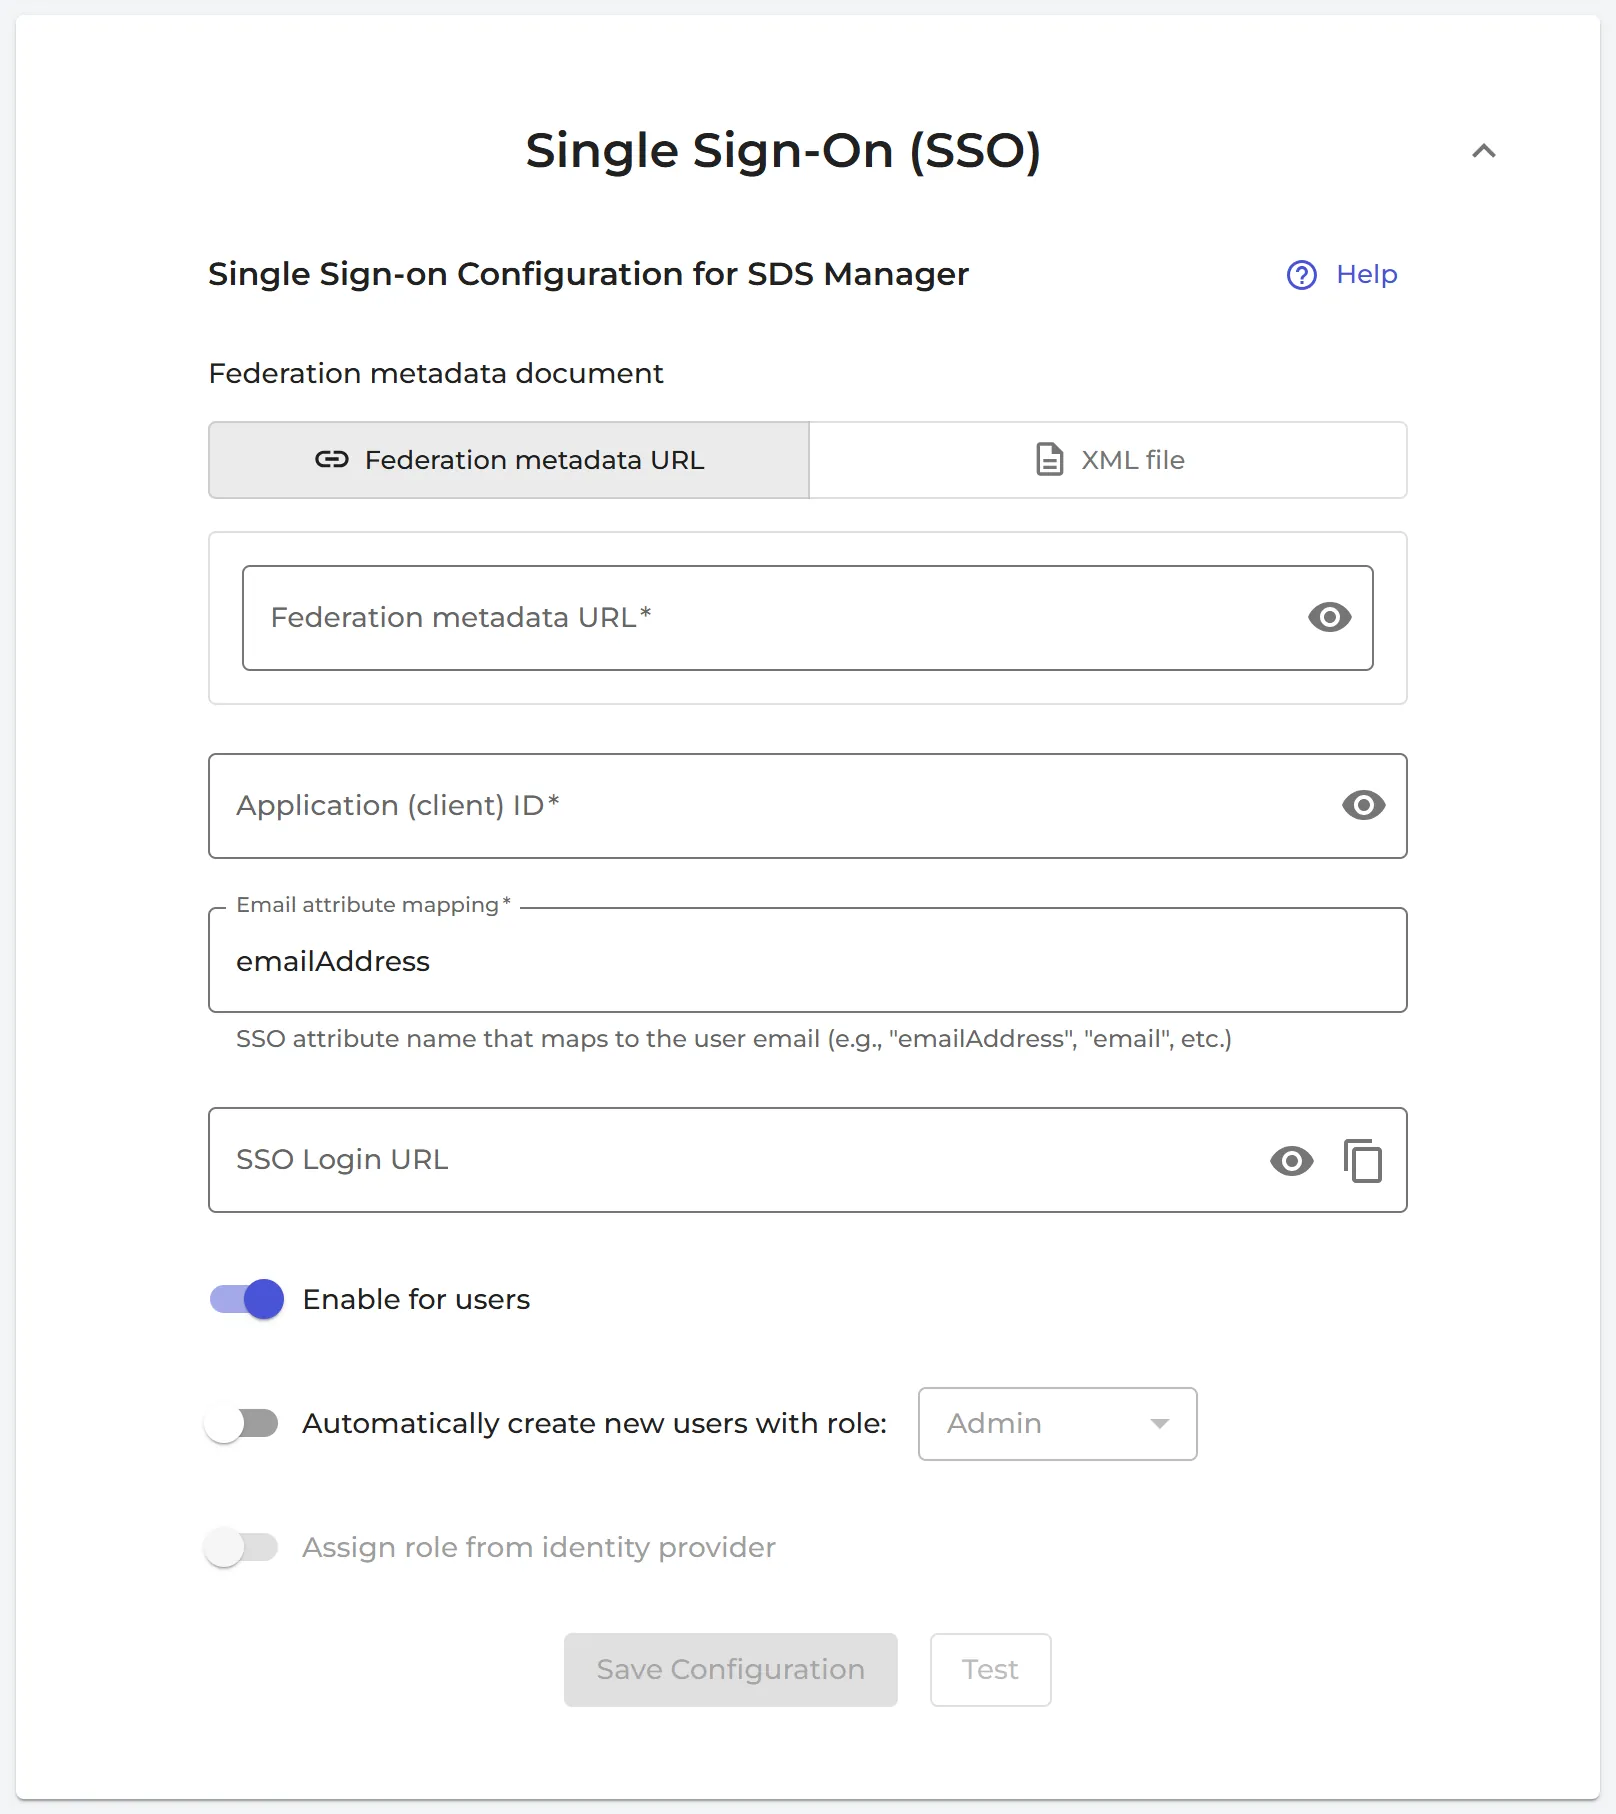
In SDS Manager, click More → Settings and open the Single Sign-On (SSO) section. Fill in:
- Federation metadata document: choose Federation metadata URL and paste the Okta Metadata URL from step 5. Or choose XML file and upload the metadata file from Okta.
- Application (client) ID: the Okta App ID.
- Email attribute mapping:
emailAddress(the name of the attribute statement from section C).
Switch on Enable for users and click Save Configuration. SDS Manager then shows the SSO Login URL, for example https://inventory.sdsmanager.com/sso/login?app_id=<App ID>. Click the copy icon to copy it. Click Test to try the sign-in in a new window.
E) Add the SDS Manager login link to the Okta app
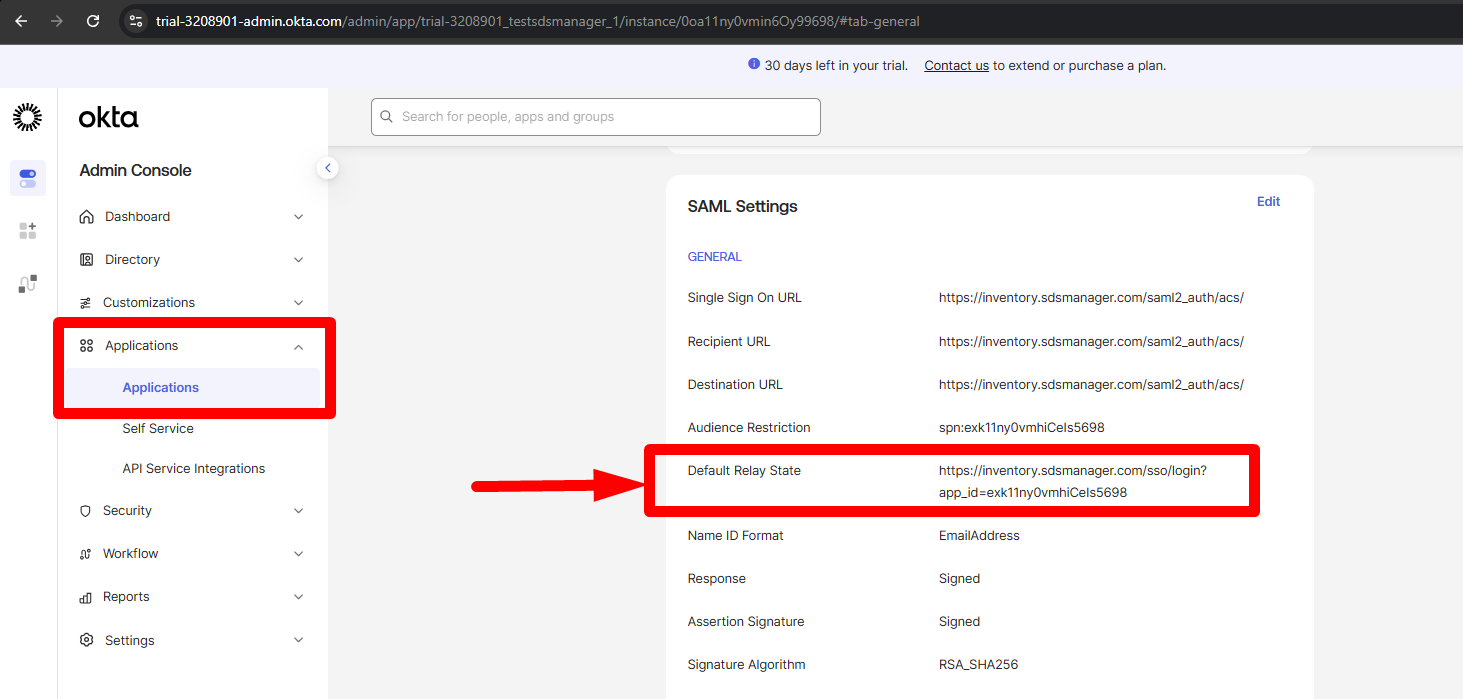
In Okta, go to Applications → Applications, open your app, then General → SAML Settings. Paste the SSO Login URL from SDS Manager into the Default RelayState field and save. Your users can then open SDS Manager from their Okta dashboard. On the SDS Manager login page, they can also click Sign in with Enterprise SSO.
F) New users and roles from Okta groups (optional)
Users who already have a user account in your SDS Manager account sign in with SSO right away and keep their role. To let other employees in, switch on Automatically create new users with role in SDS Manager and choose the role: Admin, Admin Light, Staff or No Access. The first time such an employee signs in, SDS Manager creates a user with that role.
To give new users their role from Okta instead:
- In Okta, go to Directory → Groups and create groups named after the SDS Manager roles:
Admin,Admin Light,StaffandNo Access. Add users to the right group. - Go to Applications → your SDS Manager app → Sign On → Edit SAML settings and add a group attribute statement:
- Name:
groups - Filter: for example Matches regex
.*(sends all groups), or Starts with and a prefix to send only the relevant groups.
- Name:
- In SDS Manager, also switch on Assign role from identity provider. Leave Role attribute name (optional) blank: SDS Manager finds attributes named
role,roles,grouporgroupsby itself. If you used another name in Okta, enter it here. Click Save Configuration.
If none of the user's groups matches a role, the role you chose under Automatically create new users with role is used. The role is only set when the user is created. To change it later, use More → User management.